I had read about them, saw the wide reactions and decries for defunding, but I didn't watch them. I just didn't want to. I didn't think I could stomach it.
I was right.
Finally, I followed a Facebook link and watched the latest Planned Parenthood video (as of now, there are up to ten), and it did make me sick. I watched as negotiations were made about how in tact a specimen could be, that nurses can accommodate the procedure to get certain parts at different stages of development. I had to cover part of my phone screen because I couldn't look at the mutilated body parts anymore.
I wept.
I felt ill, and the thing is, I couldn't go back to just praying for abortion victims or hoping that somehow this startling evidence could change the tide and lead to overturn Roe v. Wade.
You see, my eyes were open to the fact that I have failed. The Church has failed. Our nation has failed. Every time a woman in crisis thinks that her best solution is to have a child ripped from her womb is a failure to give her real choices and meet her needs, and we have blindly looked the other way thinking that someone else will help her.
I can support Crisis Pregnancy Centers, and advocate for adoption education, but the fact is, God was stirring my heart that I needed to do something. It was time for me to get in to the lives of women in crisis and let things get personal.
I needed to get messy.
I felt it pressed hard on my heart that is was time to get in the messy mire of crisis and let Jesus use me to help make beauty from ashes.
What could I do though? I have limited time, and limited ability to help as I have a young one at home. I already have a few irons in the fire, and our family is stretched at times to keep up with the ministry of pastoral life,
I wasn't sure how to answer the stirring in my heart.
So when my friend Beth approached me after church to tell me about a ministry that was within walking distance of my home, I listened.
I looked up Lucille's Home on Facebook and read the story of how it came about. I read about what they want to do to meet women in crisis situations and be an answer to give them hope. Our family attended their open house to see His House and even meet some of the residents.
I found myself talking to one of the women staying at the house, and I listened to her story. I cried with her and prayed over her, gave her my cell phone number.
I entered the mess.
Just this last week, I met with Sharon, the director and founder of Lucille's Home, and as she sat in my living room, we shared stories, and I listened to how God opened one door after another to bring about this work. She told me that their greatest need was for these women to have friends- other women who could listen to their stories, share the love of Christ, and be a support while sharing truth from God's word. Sometimes they might need a ride. Sometimes they might need a shoulder to cry on.
I can do that!
I can open up my home for visits and play dates. I can be a friend. I can offer rides and prayer.
I'm a part of our church's MOPS ministry, and I can bring a friend there to get support and friendship from others in the body of Christ. After all, we are just moms who need God's grace too.
I don't write this because I've got a bunch of answers, or because I know how any of this will play out. But I do know that there are many like me who look at giant problems and think, "What could I do?!?" I know I did. Whether it's a refugee crisis, the slaying of the unborn, or any of the thousands of troubles that plague our fallen world. What could a stay-at-home mom do with no training or degrees or special resources?
This has been my personal challenge. I share it because maybe you're in the same place. Maybe you're not there yet. Maybe you want to be there, and needed to read this to get there. I don't know.
I do know that what Christians have been doing in the last decades falls short. We've turned away and let others take care of it. We got comfortable in our pews- or cushy cool-toned chairs- and stopped reaching out in to the world where things get really messy. I know I have. I don't want to anymore. Jesus didn't do things that way, and I don't think I could go wrong trying to follow his example.
Sunday, September 20, 2015
Tuesday, May 12, 2015
In Which I Make a Floral Swag

I recently made a super fun floral swag, and I wanted to keep track of all the patterns I used for it. I got the idea from here, and hers turned out so pretty! It's such a neat piece that I can imagine making other ones in different color schemes or themes, but I definitely would want to streamline the process as it took many many hours to put this bad boy together! I tried different flower patterns, and made up a few of my own! Here they are:

1. Violets
2. 6-Petal Bitty Flower: In to a Magic Ring do the following... hdc, tr, tr, hdc, sl st 6x's to create each petal. Pull tight to close and fasten off. (At least I THINK that's what I did. I only made two and I did them kind of fast and never wrote them down! They were a last addition to get a little more yellow in the garland!)
3. Daisies (Don't use a soft yarn for the petals. They will curl too much. Using the cheap Red Heart Super Saver yarn worked best because it is more stiff)
4. Roses and Leaves
5. Forget-me-nots: In to a magic ring, crochet the following (I used a size H hook)- ch 2, tr, ch 1, tr, hdc, sl st- First petal made. {hdc, tr, ch 1, tr, hdc, sl st} to make 4 more petals. Pull ring tight and fasten off.
6. Buttercups (If I were to do these over, I would do only 4 petals. I think these could pass as Dogwood blossoms as well)
7. Three Layer Flower (You can stop at any of the layers and have a cute flower!)
8. Little Blues: In to a magic ring 6 sc, sl st to finish round and pull right tight to close. Switch colors and do 2 sc in each st for 12 sc total, sl st to finish round. Switch colors. {5 dc in first stich, sl st in the next st, 5 dc in the next stitch" repeat to make 6 petals total.
9. Large Leaf: Follow the pattern for the small leaf, except start with a ch 10, and do the following on each side: sc, hdc, dc, tr, 2tr, tr, dc, hdc, sc - Leave the picot the same as in the pattern above.
Leaving long tails on the flowers is helpful because that's what you use to sew them all together. I left too many out though. It got kind of awkward and messy. I would only leave one out per flower and just use that to sew. If making a garland that has some sort of symmetry to it, make flowers in even numbers. I had just 3 roses, and needed to make another at the end because it didn't look right!
To assemble, I just arranged the flowers how I wanted them to lay, and then sewed accordingly. Sewing on the BACK of stitches keeps the ugliness of the sewing stitches from showing.
To make hooks, just do chain stitches to create a "rope," Chaining about 8, and then slip stitching in the the first chain gives a good loop, if you wish.
That's it!

Saturday, January 24, 2015
Kelly and Shelly's Heart Garlands
Give thanks to the Lord, for he is good; is love endures forever.
Psalm 107:1

Around my house are reminders of truths we find in God's Word, and this year in February, I'm going to have heart garlands that will remind me of God's love for us!
Back in the Fall of 2014 my friend Michelle {Shelly} and I began learning some different patterns of shapes like stars, leaves, snowflakes, and it all started when someone asked her to make a rainbow heart garland like this one. So she started working on finding a free pattern and tweaking it to make her own. And now I just made up a mini-heart pattern! Shelly likes the "sassy" point of the heart I make! I like how each of the patterns are super simple and can be made quickly. This is my first time ever writing or sharing patterns like this, so hopefully you all can get it!
Here are the two patterns seen in the collage above.

Kelly's Mini-Heart Pattern
Hook Size: Any!
Yarn: Any!
This pattern is written in US terms
ch= chain stitch
sc= single crochet
hdc= half double crochet
dc= double crochet
sl st= slip stitch
To begin you have two options. You can start with a Magic Ring (which I learned how to do here, or do a quick search on YouTube), or you can start with Chain 4, and sl st in to the first chain to create a loop.
*Note: With the Chain 4 start, you will want to crochet your stitches OVER your tail from where you attached your yarn to your hook. This will allow you to pull the center of your heart tight, closing the hole.
Each stitch is made in to the center of the ring (be it a Magic Circle or Chain 4 Loop)- not in to the stitches.
Ch 1
1 dc
2 tr
1 dc
1 hdc
1sc
Mini Picot- Ch 2, sl st in to first chain
(now you will work the pattern backwards)
1 sc
1 hdc
1 dc
2 tr
1dc
Ch 1
Sl st into the center of the ring, fasten off
Pull anchor string tight to close the center of your heart and weave in ends.

Shelly's Heart Pattern
Hook Size: Any!
Yarn: Any!
This pattern is written in US terms
ch= chain stitch
sc= single crochet
hdc= half double crochet
dc= double crochet
sl st= slip stitch
Shelly always starts this with a Magic Ring, but I have had success with the Chain 4 start as well, but since this is HER pattern, I'm recommending starting with the Magic Ring. It's not as scary as it seems- I promise. This pattern in particular is a good one to use as a practice pattern to master the Magic Ring!
Round One: Crochet 11 dc in to a Magic Ring, sl st to join and pull ring tight
Round Two:
Chain 2, and in the same stitch, do 1 dc and 2 tr
2nd Stitch- 3 tr
3rd Stitch- dc, hdc
4th Stitch- hdc
5th Stitch- hdc
6th Stitch- (the point) hdc, ch1, dc, ch1, hdc
7th Stitch- (now repeat backwards) hdc
8th Stitch- hdc
9th Stitch- hdc, dc
10th Stitch- 3 tr
11th Stitch- 2 tr, dc, ch 2, then slip stitch in to the first stitch, fasten off and weave in ends
These two patterns look super cute together! You can alternate them on a string to make a garland, or use one or the other. You can scatter them on a table for decoration too!

Friday, January 2, 2015
#2014Crochet
At the beginning of 2014 I decided that I needed to brush up on my rusty crochet skills. I had learned to crochet from my mother, but I never made anything other than a scarf or dish cloth, and I wanted to change that! I made it a goal to be able to make a doily at the end of the year. It seemed somewhat lofty, but I was determined to do some fun things! Here's how the journey went...
January
I started the year off with something fun- a braided infinity scarf. I used a large hook, and so it had a really loose, funky feel to it. I gave it to my sister. Within 10 days of the new year, I had already made something! Fun start!


February
Next I began to explore slouch beanies. I learned the Puff Stitch, and I think this is one of my favorite patterns I tried this year.

Haddon wanted a beanie too, so I made him a more "boyish" one!


.jpg)

January
I started the year off with something fun- a braided infinity scarf. I used a large hook, and so it had a really loose, funky feel to it. I gave it to my sister. Within 10 days of the new year, I had already made something! Fun start!
My next trick was to learn how to make a Granny Square. I like the look of them and the blankets made from them are super fun. It seemed like a simple thing that every crocheter needs to learn, and mastering this stitch has led to other projects and ideas (as you will see later).
 |
| This is the very first square I made. It was out of a beautiful burgundy yarn I got in a bargain bag. |
 |
| My bargain burgundy yarn inspired this! I made this for my grandmother, and she loved it. It was a lap blanket that fit on her lap perfectly. But alas, it is no more! Someone washed it in a regular cycle and it ripped in some places. I"m currently frogging it, and maybe it can be recycled in to something new! |
I've always like those headband ear warmers- especially the ones that my friend Michelle makes! So I wanted to give that a try. At first I really wanted to make a cable knit one, but after giving it a few tries, I gave up. Maybe now I can try again, but I ended up finding a pattern that taught me the Camel Stitch. I looks like knit, but it's crochet! Again, this was a handy new stitch to learn.
I made this pattern a few times. One I made for myself (shown below), and then I tried to make one for Norah. But that one was too small for her, so I got to give it away. Finally I made her another. But this was a quick and easy pattern that I enjoyed making. Again, this one will come up later!
Next I began to explore slouch beanies. I learned the Puff Stitch, and I think this is one of my favorite patterns I tried this year.
Haddon wanted a beanie too, so I made him a more "boyish" one!
March
As Easter approached, my friend Michelle and I saw a chance to do a fundraiser for earning money for our adoption. You see, we were going to need to renew our home study and order new photo books. I thought that I could make a bunch of bunnies and do an online auction called Bunnies for Books to help with the cost of getting the photo books.
As it turned out, on March 8th our lives changed forever! Karalynn joined our family and we no longer needed to raise any more funds because our adoption journey had reached its end! We didn't need to renew our home study and obviously we didn't need to order more books. So while I sat in the NICU with my new daughter, I still crocheted little squares that could be stuffed and sewn in to little bunnies that could be auctioned off for our friends for THEIR adoption fund.
Thus began Bunnies for Baby McCain! It was so much fun, but a lot of work! These bunnies raised $300 for our friends, and it was such a joy to support them!
April
As you can imagine, after Kara came home, I didn't have too much time to crochet, so my projects were on hold for a little while!
May
I began to put Kara's room together, and she needed a blanket for the rocking chair in her room. So I went back to another Granny Square pattern, and put it together with a Classic Granny Square. I also learned a joining technique and made her a super cute blanket to go on her chair! I love it, and it might be my most favorite thing that I made this year.
It took seeking advice and learning from other crocheters. I didn't follow a pattern exactly, but pieced something together on my own. It was a long process, but I really enjoyed it and really really like the end product!
June
Not much was made after that major project! Again, having a little baby held up some crafting I could have been doing!
I did manage to mess around with learning a Granny Triangle though! I made Kara these sweet little barefoot sandals!
But Haddon's birthday was coming, and he wanted to have a Harry Potter birthday. He would obviously be sorted in to Hufflepuff House, so he needed a shirt and scarf to fit in with the rest of the Hufflepuffs.
July
I love the way his t-shirt and scarf turned out! (I kind of want a shirt for myself!)
August, September, October
In August I broke my finger! So that put the halt on crocheting. But I was able to help my little Snow White for Halloween.
November
In November we had a major cold snap! Norah didn't have anything to wear to keep her head warm. So I took advantage of the weather and made her something- especially since I had made a beanie for Haddon. This is another instance in which the Granny Stitch is so fun! She loves her beanie.
And, the Camel Stitch came in handy again too! I made this sweet headband ear warmer for Karalynn because of the same cold snap, and my friend Katherine liked it so much, she needed to have one for her little girl, Avery. (I also made Kara a second one that is black with silver yarn with a red bow on it- but it was a little too big! So she doesn't wear it!)
 |
| I used gold sparkle yarn to make Avery's head band perfect for the holidays! I am so happy with how it turned out- and seriously, could she be any cuter?!
Not only did I get in to these sweet head bands, but I also started making garlands for craft bazaar season! I learned how to make stars and snowflakes. Michelle and I also made different leaves to make fall garlands. What was nice about learning these patterns was that it taught me how to follow a step-by-step pattern to create a shape.

December
Once craft bazaar season was over, I finished a sparkly snowflake garland for Michelle's Christmas tree. I never took a picture, but it was a pretty quick thing to make. I used the leftover white sparkly snowflakes from the season, and alternated red sparkly ones with them. I actually just saw it for the first time on her tree today, and I was glad to see that it was long enough and worked so nicely with her white, silver and red tree!
Update: SHE took a few pictures for me! So here's a little glimpse of her garland....

Then I needed to do something that I had planned on doing for most of the year, and that was make a hat for Kim. On Facebook, I participated in a "pay it forward" exercise, and I had intended to make her a beanie. So I go that done in time to give it to her on Christmas Eve! I used the same pattern that I did for Norah's beanie, but Norah's somehow became a slouch beret beanie looking thing- which was cute! So I tried to duplicate it for Kim, and I ended up making the hat the way it was supposed to be! Whoops! She still liked it, and it was fun to make it!

Then it was time to make something for myself! I had been eyeing this pattern that I found on Pinterest for a long time, and I finally had the chance to make it. It was able to do it in a couple days and finished it just in time to wear it the Sunday after Christmas! I love it!
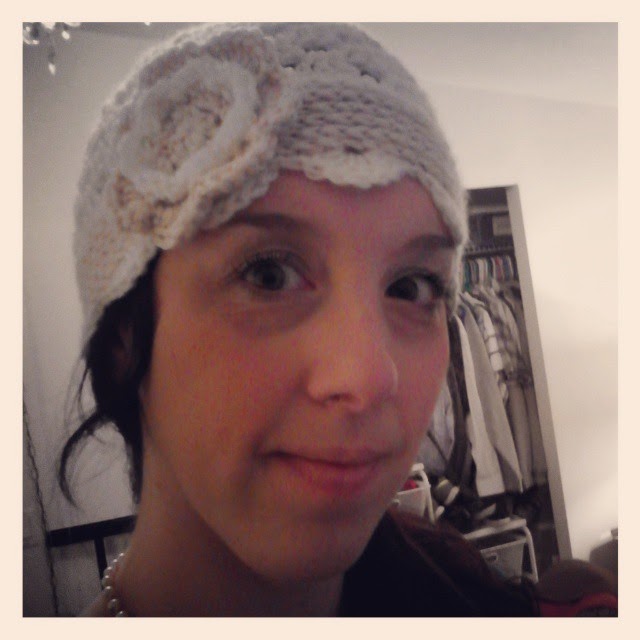
For this hat, I used the pattern written for the main part, and then instead of following the pattern completely, I did rows of Camel Stitch and then finished with the scalloped edging. I learned to make the flower from another tutorial. So I kind of pieced this one together on my own! I just took elements from other things I had learned.
Finally, it was time to make a doily! So the night before we left for TLC- Teen Leadership Conference- I sat down and found a pattern that looked easy enough to follow that I liked. I knew I needed to start it before we left because we would be spending New Year's Eve at the camp.And here's what I came up with!

While we were in the cold of Antelope, Oregon, I started making this beanie for Haddon to wear with his Hufflepuff scarf- because his other one just is a little too much with it! I didn't get it finished before we rang in the new year, but I did finish it this morning!

There! I actually stuck to my 2014 resolution, and it was so much fun to do! I so enjoyed the journey and love that I have things in my home that I made myself or jgot to make things for people I love. I was even able to make a little bit of money!
I think I will continue to learn and grow and make things in the new year. I already have a queue of patterns I want to try and make!
|
Subscribe to:
Comments (Atom)